
Since 1 May 2025, every foreigner entering Thailand — by air, by land or by sea — must fill in the electronic TDAC (Thailand Digital Arrival Card) in advance. You do it online, no earlier than 72 hours before arrival. At the border you show a QR code instead of a paper form.
The TDAC is free and exists only on the official site of the Thai Immigration Bureau — tdac.immigration.go.th. Fake sites have appeared that harvest passport data and offer to “process your card for $10” — that’s a scam: the TDAC never requires payment.
Step 1. Open the official site
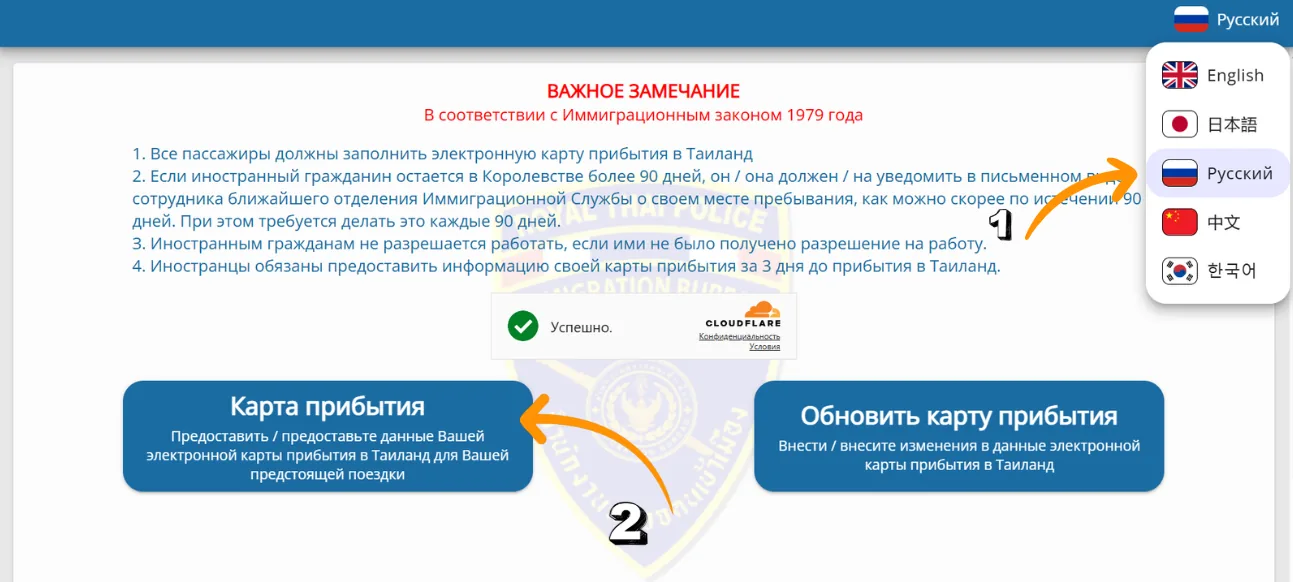
- 1.Pick your language — the form has official translations;
- 2.Click the “Arrival Card” button to open the online form.
Step 2. Personal details
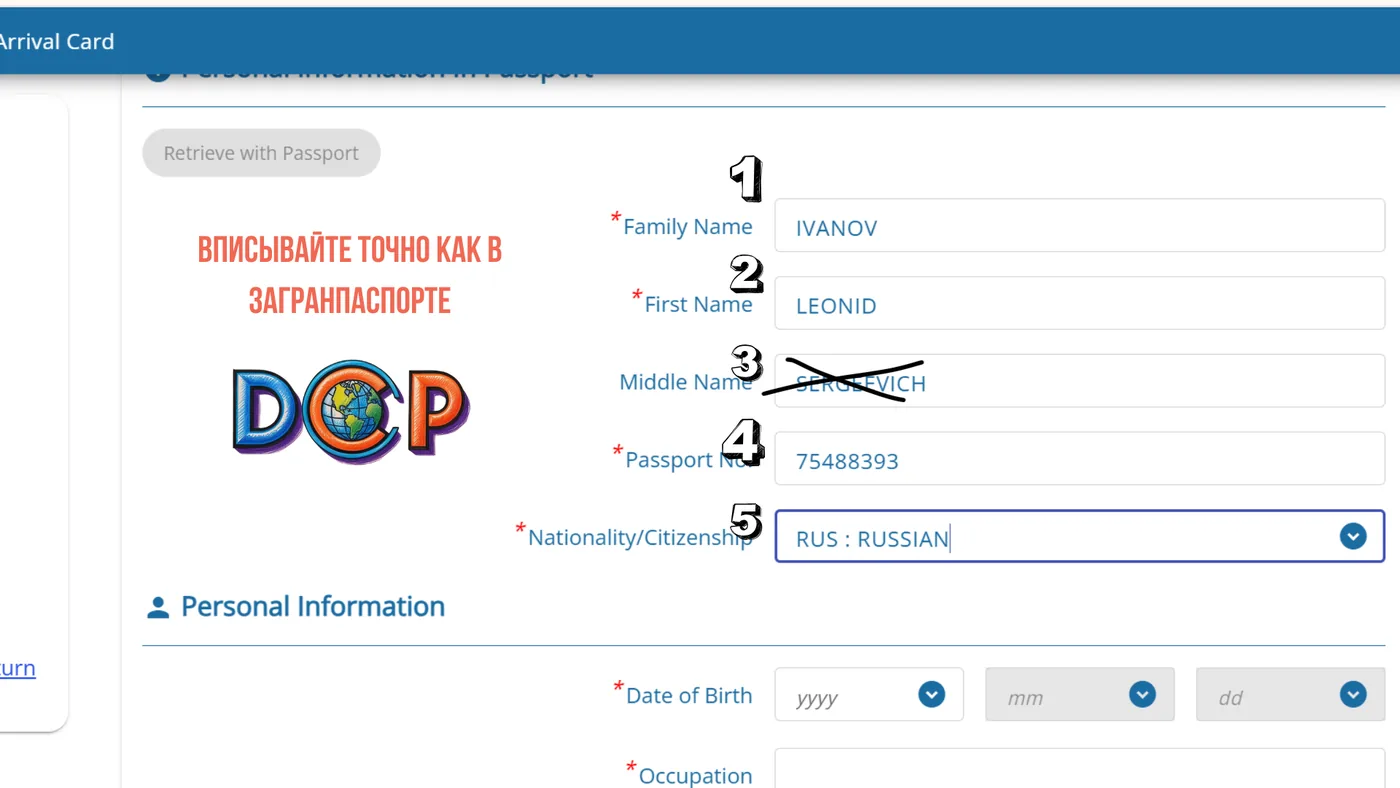
Enter everything exactly as it appears in your passport, in Latin letters.
- 1.Surname;
- 2.First name;
- 3.Middle name — leave it blank. This field is not for a patronymic;
- 4.Passport number;
- 5.Nationality / citizenship;
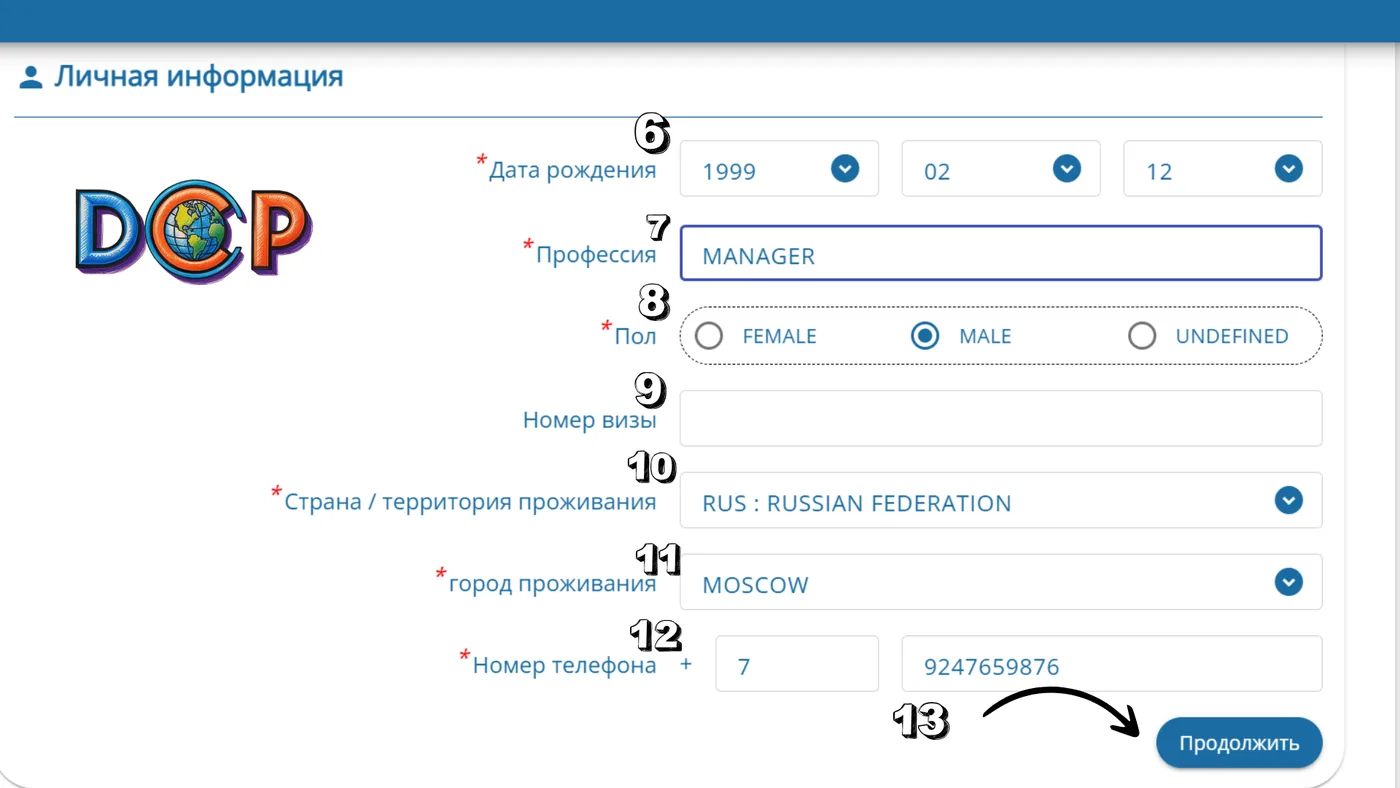
- 6.Date of birth;
- 7.Occupation. If you’re travelling on a DTV, give the same occupation you put in the visa application;
- 8.Sex;
- 9.Visa number, if you have one. If not, leave it blank;
- 10.Country / territory of residence;
- 11.City of residence;
- 12.Phone number;
- 13.Click “Continue.”
The numbers on the screenshots match the list items:
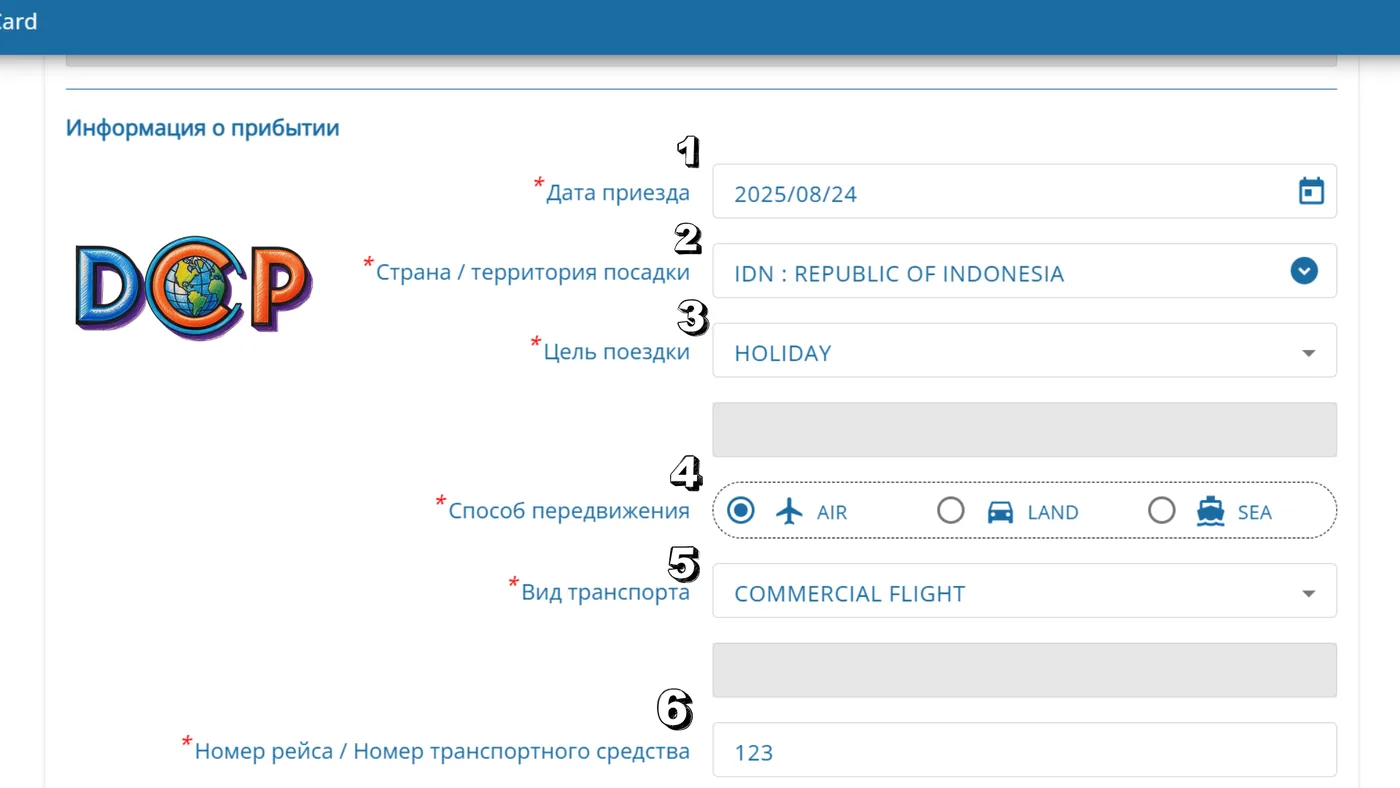
Step 3. Arrival date and purpose
- 1.Date of arrival in Thailand;
- 2.Country / territory of boarding — where you’re flying from;
- 3.Purpose of travel;
- 4.Mode of travel;
- 5.Mode of transport;
- 6.Flight or vehicle number.
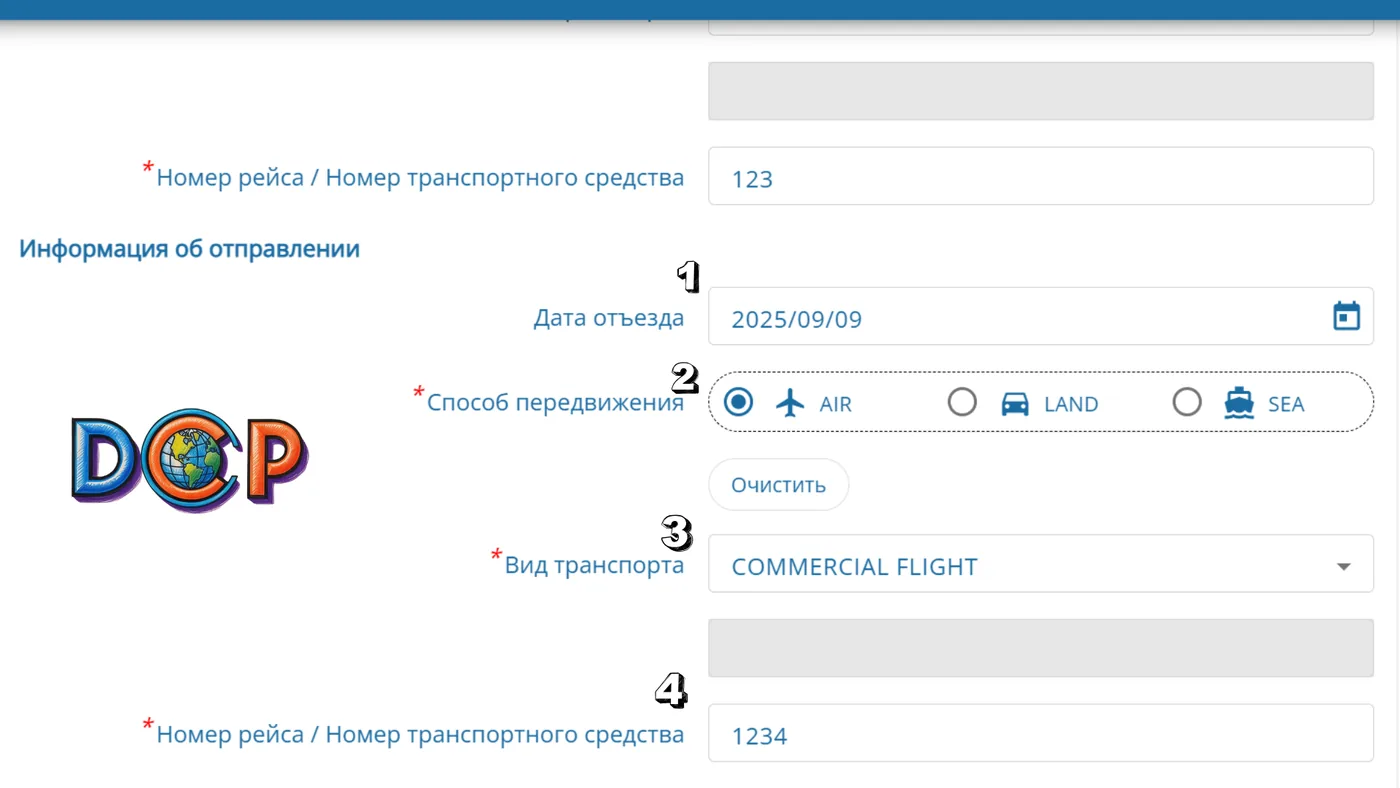
Step 4. Departure information
- 1.Your expected date of departure from Thailand;
- 2.Mode of travel. If you have no return ticket and plan to stay a long time, choose “LAND,” then “OTHER” in the next field, and write “WALK” in the extra field;
- 3.Mode of transport;
- 4.Flight number. If you don’t know it, any real future flight will do — pull one from Google Flights.
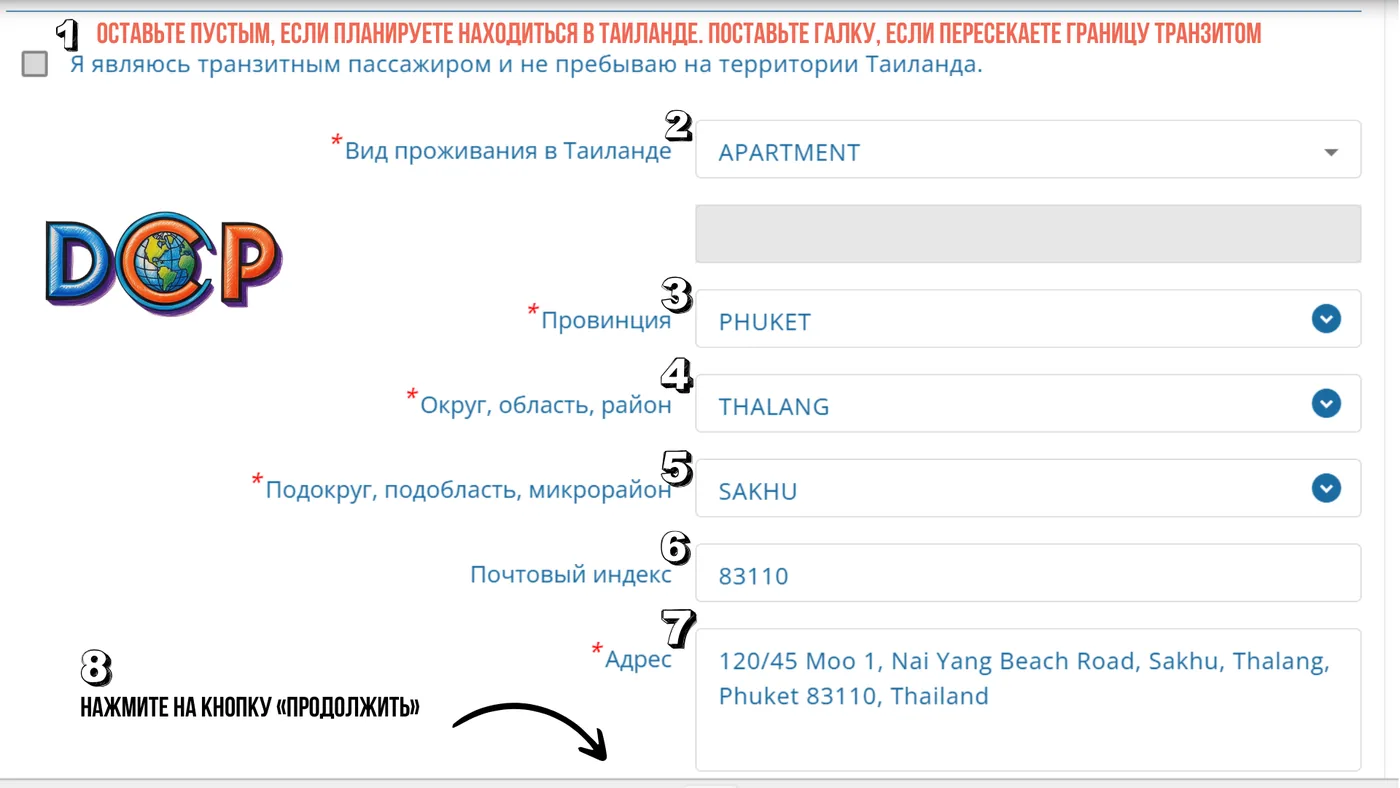
Step 5. Accommodation in Thailand
- 1.Leave the first checkbox empty if you’re staying in Thailand. Tick it only if you’re in transit;
- 2.Type of accommodation (hotel, apartment and so on);
- 3.Province;
- 4.District;
- 5.Sub-district;
- 6.Post code;
- 7.Address. The easy way is to find your hotel on Google Maps and copy the exact address from there. Note that the form sometimes refuses to save pasted text — in that case type the address by hand;
- 8.Click “Continue.”
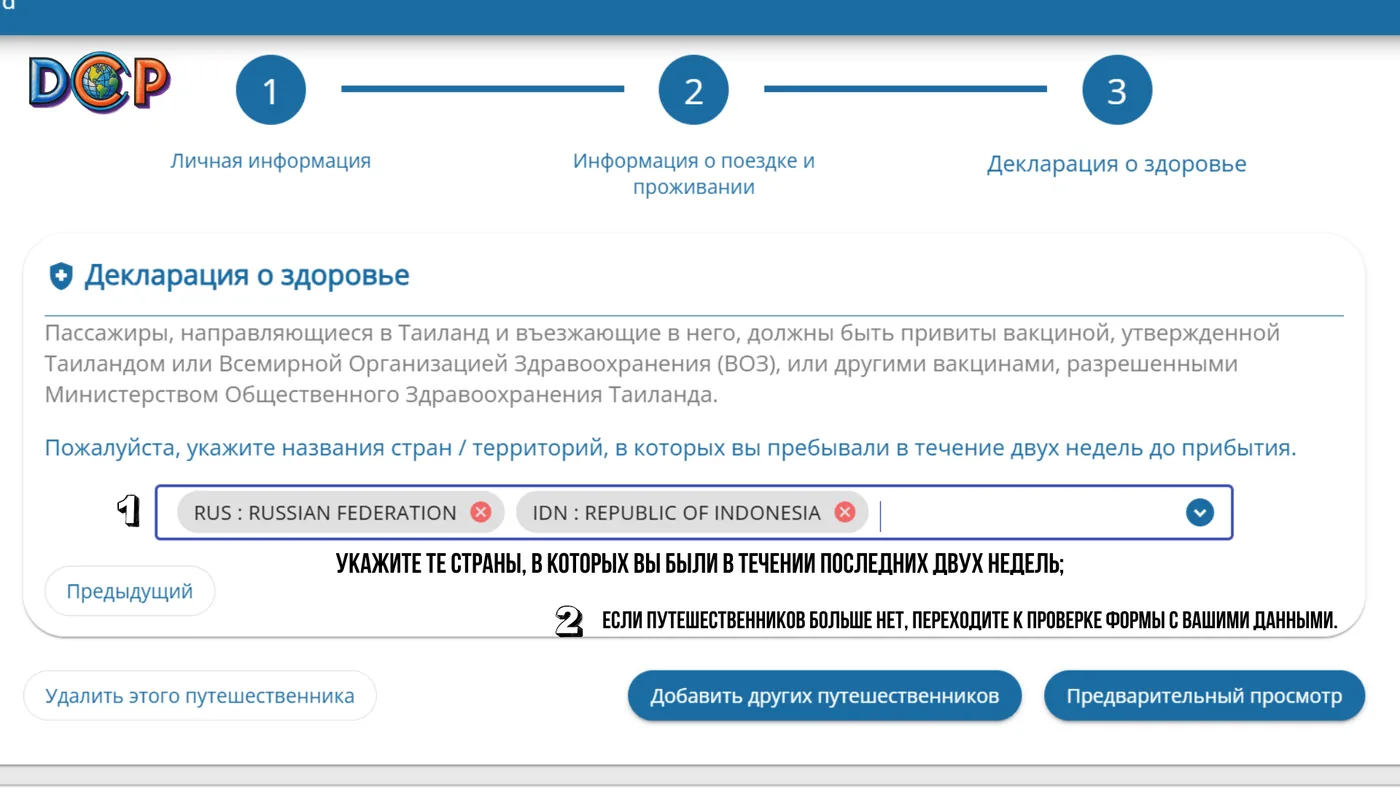
Step 6. Health declaration
- 1.List the countries you’ve been in over the past two weeks;
- 2.The form will then offer to add other travellers;
- 3.If you’re travelling alone, move on to reviewing your data.
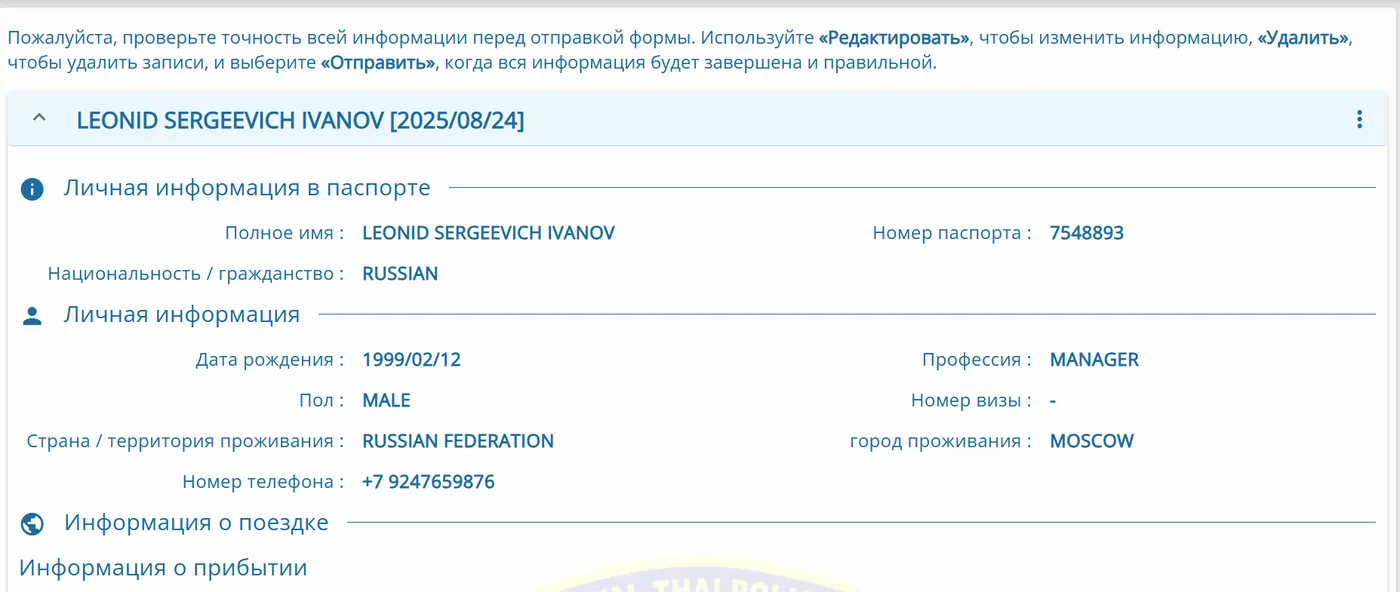
Step 7. Travel companions and review
Here you can add cards for everyone else in your party — a family is easiest to submit as one application. Once everyone is added, go to the review screen.
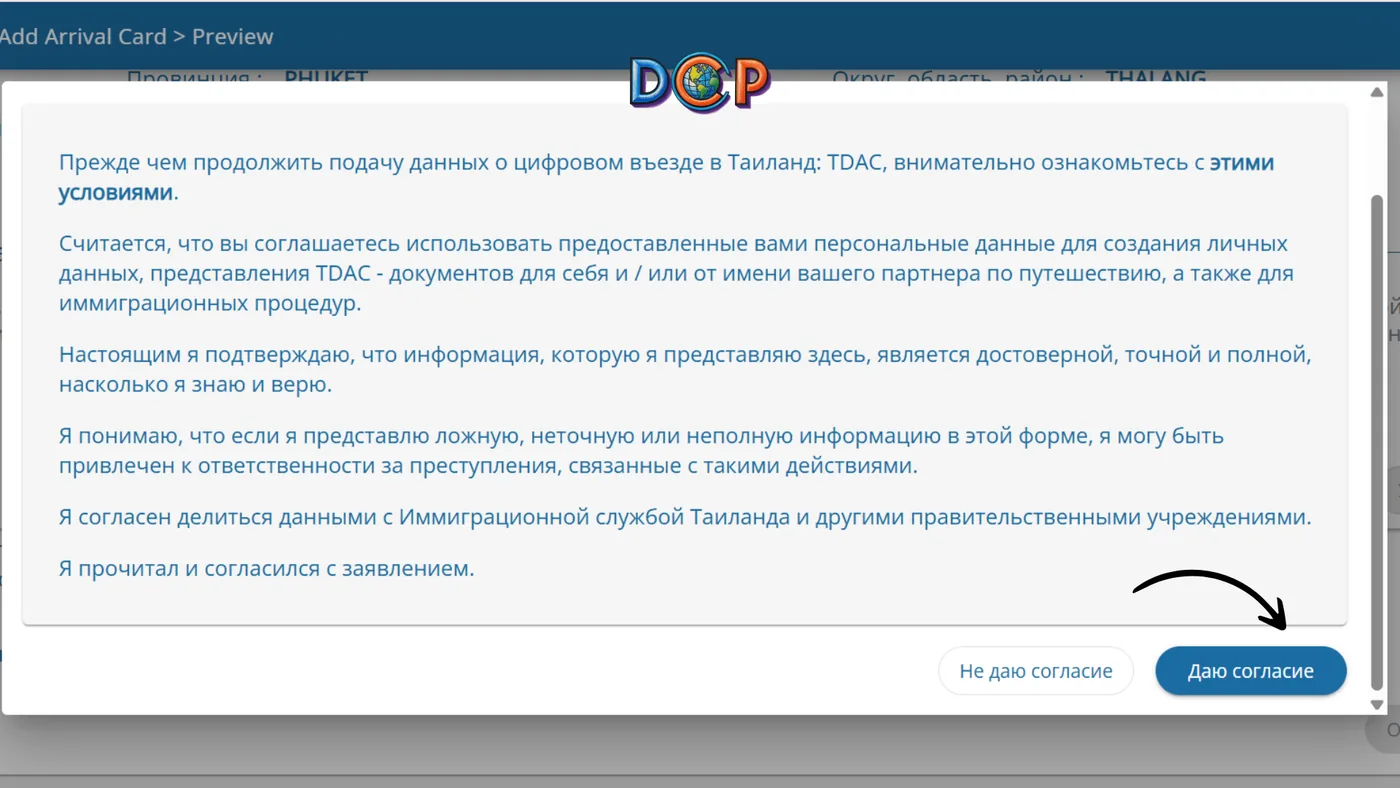
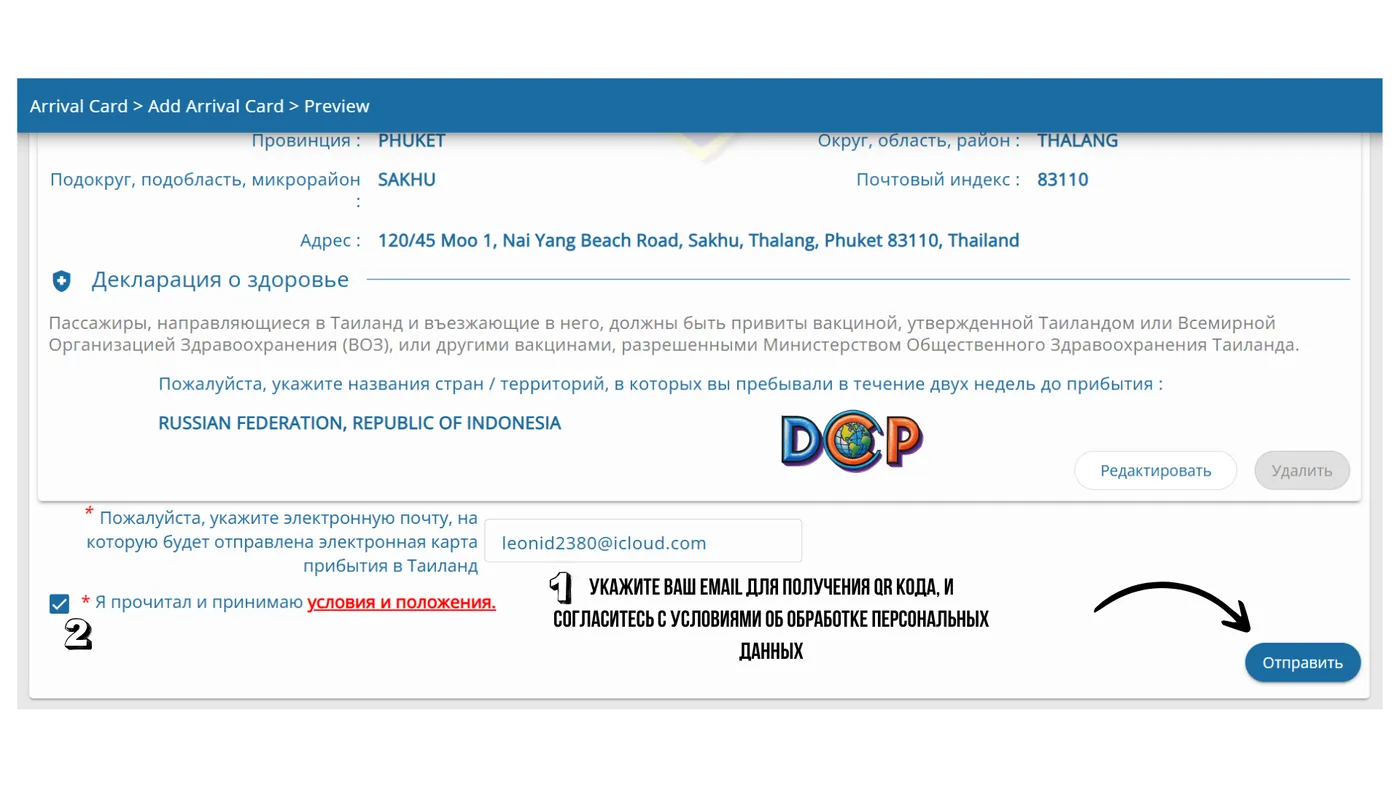
Step 8. Email and consent
Enter the email address the QR code should go to, and agree to the personal data processing terms.
Step 9. The QR code in your inbox
- 1.The QR code arrives at the email you gave;
- 2.Print it out or save it to your phone;
- 3.Show the QR code at passport control when you land.
The whole card takes about ten minutes and adds nothing to your time at the border — it replaces the paper form instead. The one thing not to do is leave it until you’re at the gate: the window is 72 hours, and Wi-Fi at your departure airport is a lottery.
Be ready, too, for the border to ask about a return ticket now and then — with any visa, that’s standard practice at passport control. The TDAC doesn’t settle that question.
The instructions above are enough to do the TDAC yourself. Workshop clients — the people whose visas we handled — we walk through the arrival card personally: just message us before you fly.